We just upgraded a 2011 Apple Mac Mini to have an SSD, a second hard drive, and new RAM.
Video
Also available on YouTube in High Definition or Standard Definition.
Parts List
- OCZ 120 GB Vertex 3 SATA III 6.0 Gb-s 2.5-Inch Solid State Drive VTX3-25SAT3-120G
- Western Digital 1TB Blue WD10JPVT 5400RPM, 8 MB cache, 2.5 inch, 9.5MM height hard drive
- Corsair 8 GB DDR3 Laptop Memory
Kit CMSO8GX3M2A1333C9
- Apple Mac Mini
Model MC816LL/A 2.5 GHz Intel Core i5 dual-core processor, AMD Radeon HD 6630M graphics, 4GB RAM, 500GB hard drive
- Cable: Apple Part 922-9560, also called “Apple Mac Mini Server (Mid 2010) Bottom Hard Drive Server Flex Cable” or “Hard Drive Flex Cable Bottom”. We used part number 1009005 at welovemacs.com. This is sold as a kit from ifixit.com.
Alternate Parts List
The OCZ Vertex 3 is the fastest consumer SSD at the moment. Other SSD’s that you might consider include:
- Highest reliability SSD: Intel 510 Series 120 GB
- Best value high capacity SSD: Lexar Media Crucial 512 GB m4
The Western Digital Blue drive mentioned above is high capacity and quiet. For a faster spinning hard drive consider:
- Western Digital 750TB Black WD7500BPKT
7200RPM, 16 MB cache, 2.5 inch, 9.5MM height hard drive
The dedicated graphics in the mid-tier Mac Mini make it worth it for me. But for the cheapest Mini, consider:
- Apple Mac Mini MC815LL/A 2.3 GHz Intel Core i5 dual-core processor, integrated Intel HD Graphics 3000, 2GB RAM, 500GB hard drive
UPDATE: My video shows adding two 9.5MM height drives. I just upgraded another Mac Mini with a 9.5MM SSD and a 12.5MM standard hard drive. As with my first upgrade, the hard drive goes in the bottom slot (the side closest to the top of the case when upright). This does fit. But first you need to slide the logic board out slightly. Be sure to remove the IR port adapter before sliding out the logic board. The OWC video shows how to do this. I used a cut up coat hanger to insert into the logic board holes and slide it out.
First Boot
Starting with a blank hard drive is easy on the 2011 Mac Mini. Hold down Command-R to boot into Lion Recovery which allows you to format the drives and download Lion over the Internet.
TRIM Support in Lion
For optimal SSD performance, enable TRIM support within OS X Lion. Grant Pannell describes the terminal commands to enable TRIM.
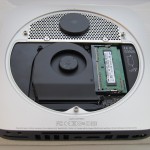
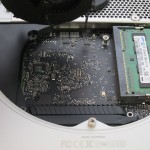
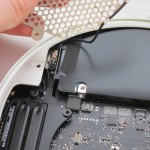
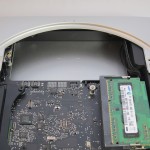
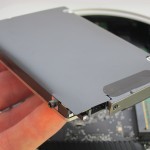
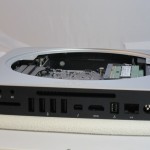
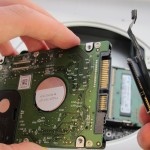
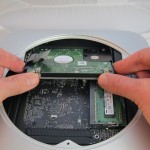
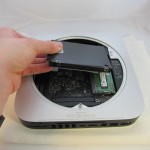
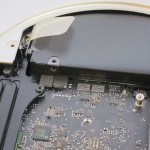
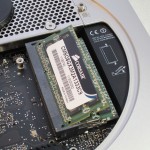
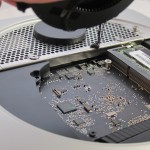
Photos of Upgrade

And just to add to my question above…Would it be wiser to get the i5 processor, rather than upgrade to the i7, if heating issues would indeed be a problem? I don’t even have necessarily evidence that they would be!
Great work on this upgrade I can’t wait ! – can you just give me some specs on those screws you put on the bottom hard drive(WD) — I need to ask the computer shop for the right size
Don’t know the size, but they’re standard screws for holding laptop hard drives.
I think the cable title should be updated as the top flex cable; part number 076-1391 1000714 on we love macs. Otherwise the suggested part number in this article may cause confusion.
Probably a silly question, and I suspect I know the answer, but I’ll ask anyway…how does doing this RAM/HDD upgrade affect the warranty, particularly the additional AppleCare Protection Plan?
Apple is usually pretty nice about this. If what you did clearly broke the computer, then it’s not covered. But if they’re feeling nice and what you did clearly was unrelated to the problem, then they’ll often continue to cover it. Still, it’s best to remove any 3rd party upgrades prior to bringing it in for warranty work, just to make sure that the upgrade isn’t the cause of the problem.
Thank you for a very nice information. Thanks.
I have change my original hard drive to a SSD disk (Corsair) and also change to 16 GB RAM (Corsair). It take around 15 minutes for my to do the operation, and a restore with Time machine take ca. 1 hour (200 GB).
My Mc is a Mac Mini 2011 (500/2GB). A note: i don´t disconnects the WiFi wire, it was not necessary.
Now i have a very fast Mac…
Fantastic Video, Thanks!
-I just did this to a Mac Mini I purchased in the last month, and went through the Internet Recovery. Three items of note:
1. Getting the additional hard, or even the original drive for that matter, back in the mini can be tricky, especially trying to move the bundled wires on the right side out of the way. Be careful, and don’t force things too much.
2. I upgraded the memory in my mini to 16GB. (More than is available on the Apple Website) – After the install I was UNABLE to do the internet recovery.*
3. The first time through the menu system for OSX utilities, you MUST format your new drive with a Mac OS Extended filesystem to get it to show up in the Lion Install page. If you don’t you can’t get back to the utility screen and have to reboot again.
*After I went through the process, I was unable to use the OSX Internet Recovery, even forcing it multiple times with Command+Option+R. I finally removed the 16GB of memory and replaced the 4GB that I bought it with. That was the trick to be able to get it to do it! I’m wondering if the ROM image containing the bits to contact the Apple servers to facilitate that do some kind of checksum with the RAM installed. I know it works, because I installed it the mini with the HD that came with it.
Thanks Again!
Maybe this is a silly question, but will any SATA III 2.5″ SSD be compatible with a 2011 Mac Mini?
As bj notes, your instructions specify the wrong cable. I wish I’d read his comment before proceeding. Now I’ve got a cable that doesn’t reach.
I appreciate your providing this how-to video, but please correct this: it is the TOP server hard drive cable that is required. If you check out the iFixit kit that you referenced, they properly refer to it as the top cable. As I’ve found out the hard way, the bottom cable does not work, it is too short.