We just upgraded a 2011 Apple Mac Mini to have an SSD, a second hard drive, and new RAM.
Video
Also available on YouTube in High Definition or Standard Definition.
Parts List
- OCZ 120 GB Vertex 3 SATA III 6.0 Gb-s 2.5-Inch Solid State Drive VTX3-25SAT3-120G
- Western Digital 1TB Blue WD10JPVT 5400RPM, 8 MB cache, 2.5 inch, 9.5MM height hard drive
- Corsair 8 GB DDR3 Laptop Memory
Kit CMSO8GX3M2A1333C9
- Apple Mac Mini
Model MC816LL/A 2.5 GHz Intel Core i5 dual-core processor, AMD Radeon HD 6630M graphics, 4GB RAM, 500GB hard drive
- Cable: Apple Part 922-9560, also called “Apple Mac Mini Server (Mid 2010) Bottom Hard Drive Server Flex Cable” or “Hard Drive Flex Cable Bottom”. We used part number 1009005 at welovemacs.com. This is sold as a kit from ifixit.com.
Alternate Parts List
The OCZ Vertex 3 is the fastest consumer SSD at the moment. Other SSD’s that you might consider include:
- Highest reliability SSD: Intel 510 Series 120 GB
- Best value high capacity SSD: Lexar Media Crucial 512 GB m4
The Western Digital Blue drive mentioned above is high capacity and quiet. For a faster spinning hard drive consider:
- Western Digital 750TB Black WD7500BPKT
7200RPM, 16 MB cache, 2.5 inch, 9.5MM height hard drive
The dedicated graphics in the mid-tier Mac Mini make it worth it for me. But for the cheapest Mini, consider:
- Apple Mac Mini MC815LL/A 2.3 GHz Intel Core i5 dual-core processor, integrated Intel HD Graphics 3000, 2GB RAM, 500GB hard drive
UPDATE: My video shows adding two 9.5MM height drives. I just upgraded another Mac Mini with a 9.5MM SSD and a 12.5MM standard hard drive. As with my first upgrade, the hard drive goes in the bottom slot (the side closest to the top of the case when upright). This does fit. But first you need to slide the logic board out slightly. Be sure to remove the IR port adapter before sliding out the logic board. The OWC video shows how to do this. I used a cut up coat hanger to insert into the logic board holes and slide it out.
First Boot
Starting with a blank hard drive is easy on the 2011 Mac Mini. Hold down Command-R to boot into Lion Recovery which allows you to format the drives and download Lion over the Internet.
TRIM Support in Lion
For optimal SSD performance, enable TRIM support within OS X Lion. Grant Pannell describes the terminal commands to enable TRIM.
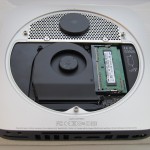
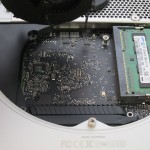
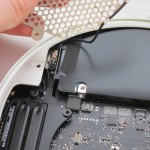
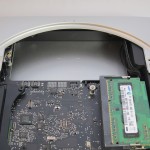
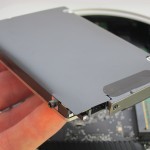
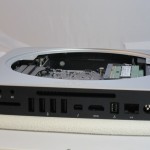
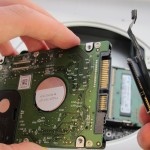
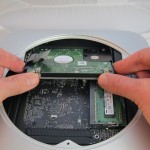
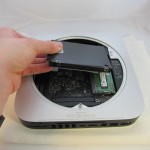
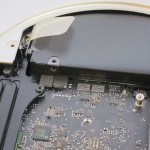
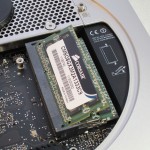
Photos of Upgrade

Excellent video! Thanks for posting. I can’t wait to upgrade mine.
I noticed the 2011 mini does not have a temp sensor taped to the hard drive. I assume OS X looks at the hard drives built in one to regulate the fan. Does the temp regulated fan still work using 3rd party hard drives?
Good question. The fan does still work and ramps up and down properly. I don’t know if it’s using the new drive’s temperature sensor or just another sensor in the box.
To enable TRIM (for SSDs that support it) under OS X Lion for non-Apple SSDs:
Backup the file that you’re about to patch
sudo cp /System/Library/Extensions/IOAHCIFamily.kext/Contents/PlugIns/IOAHCIBlockStorage.kext/Contents/MacOS/IOAHCIBlockStorage /IOAHCIBlockStorage.original
Patch the file to enable TRIM support
sudo perl -pi -e ‘s|(\x52\x6F\x74\x61\x74\x69\x6F\x6E\x61\x6C\x00).{9}(\x00\x51)|$1\x00\x00\x00\x00\x00\x00\x00\x00\x00$2|sg’ /System/Library/Extensions/IOAHCIFamily.kext/Contents/PlugIns/IOAHCIBlockStorage.kext/Contents/MacOS/IOAHCIBlockStorage
Clear the kext caches
sudo kextcache -system-prelinked-kernel
sudo kextcache -system-caches
Would this also work with the 2.7 i7? Is there any reason besides price to not?
Should be exactly the same. I see no problem.
Excellent video. Thank you very much.
I have a new 2.3 Mini which I am enjoying but wanted to make this very upgrade but didn’t know exactly how hard it would be. With your video it should be a pretty straight forward job. I’ve already installed 8GB of the same Corsair memory you used and think I will reuse the Toshiba HD that came with my Mini since 500GB in enough for me right now.
How to you find the performance compared to the stock drive? Is there a noticeable difference?
Huge improvement. It boots in about 12 seconds.
Thanks Rick. I think I’ll order the drive and cable today!
Thanks. This is very good and clear! Any reason for putting the ssd second? I assume either port is fine?
Rick – Great video, better than the OWC one.
Could you have left the original Toshiba HD in place and simply installed the OCZ Vertex as the boot drive?
How does the Lion recovery process know which drive to reinstall the OS to?
Thanks
I put in the SSD second with the idea that the hotter hard drive would dissipate heat better through the aluminum at the top of of the Mini case.
The original drive needs to be removed in order to install another drive. Lion Recovery allows you to choose the install drive.
Hello,
first of all – great video.
I bought a new Mac Mini 2,5GHz with 8GB RAM.
I changed the original 500 GB Toshiba HDD to my Samsung 650GB of my old Mac Mini C2D with a Lion system installed.
But the new Mini don´t boot from this HDD.
In the Bootmenu the Samsung HDD is found.
Then i tried to boot an CCC backup image from my firewire HDD but nothing happend.
I took my self made Lion USB Bootstick but nothing.
Can you help me please?
Best Regards
Jolly Roger
Hi Rick, I just wanted to increase the storage of my mini, so I only bought one drive. Since WD10JPVT is not available anywhere, I bought the 12.5mm version WD10TPVT, also 1TB. I managed to fit the TPVT into the mini. It powered up and went into recovery mode. However, when it comes to disc selection for Lion installation, mini shows no discs in the list. I than put the original drive back in, it is working again. Do you know what the problem could be? I have enough experience in building/modifying PCs. But this is my first Mac so I can really use some help. Thanks.
Try going into Disk Utility within Lion Recovery. If the disk is there, format it as Mac OS Extended (Journaled). Use the GUID Partition Table available under Options. If Disk Utility can’t see the drive, it is probably a broken drive or not connected properly.
Great video! Wish I had used your video instead of the OWC video. OWC instructs you to remove the IR board cable in order to slide out the logic board. Well, the video isn’t too clear on how to remove the cable, so I ended up with the socket popping off the logic board. I understand this has happened to others also. Apparently the only thing affected is the remote and the power light. Correct me if I am wrong.
Thanks for the great video.
It’s easy to rip the wires out of the IR port. I oversaw someone who did the same thing when he had to pull out the logic board in order to fit a 12.5MM drive. I suggest you do what we did. Carefully push the wires back into the little adapter. They aren’t clamped in. They just can be shoved right back. The difficulties are: 1) it’s extremely small (it helps to have good eyes and small hands), and 2) you need to have the cable colors in the right order. You can kind of see the colors of the cables somewhat by looking at this image I have:
http://www.techdc.com/wp-content/uploads38454/2011/08/11-New_SSD_Flex_Cable.jpg
Rick, you misunderstood…the socket ripped off the logic board. There’s nothing to slide the cable into. The cable and the socket came off.
Rather than bringing it into Apple to replace the logic board for $300-$400, I just sold it on Amazon for a net of $448 after shipping costs. I purchased a new one from Amazon for $568 shipped and delivered by Weds. I figure a $128 hit is much better. I was clear about what was wrong with it and there buyer can live with no remote or power light.
Thanx, Rick, good video.
So please tell, have you any problems with mac mini 2011 + Vertex3, like many people have w mbp 2011 (beach balls, freeze, no return after sleep, not detected SSD after shutdown, missed data, etc.) ?
Hi rick I was wondering if you can put both hard drives in on the mac mini 2011 2.3ghz
Hello:
Great video !!!
Would this also work with the Mac Mini (2010) 2.4MHz Intel Core 2 Duo P/N MC270Y/A?
I just want to change the HD and keep the SuperDrive.
Yep, that’s possible.
No problems. It all works.
Yep, everything is laid out the same way with the 2.3ghz model.
Do you know what is the difference between the WD10JPVT and WD10TPVT?
The newer WD10JPVT is 9.5mm tall so it is smaller than the 12.5mm WD10TPVT. This allows the WD10JPVT to fit in all standard HD laptops. The WD10JPVT uses 2 platters instead of 3, meaning that it has higher data density as well and a little better speed because of it.
Hi Rick I just got my Mac mini week ago and would like to put in SSD as my main drive and the drive i have in my mac mini now as a secondary drive. I understand the hardware part of the installation but i don’t know the best and easy way of installing Lion back on the SSD drive. Should i just clone the hard drive i have in my mac mini and and install it in the new SSD and then format the old hard drive?? whats the easiest software to use to clone the drive? or should i just format the hard drive in my mac min i don’t really have that much on it cause i just bought it and then install SSD with fresh Lion through lion recovery?
Great video! Thank you
I’m thinking of keeping the stock 500GB drive that comes with the 2.3 Mini when I order one… How would doing so alter the SDD installation instructions? Do I need to reformat the stock HDD first?
Either method works. If you do a disk copy, SuperDuper is a good tool for that.
If the stock drive is the secondary drive, you can just format it with Disk Utility after you have the computer in the new configuration. If the stock drive is still the OS drive, then there’s nothing to do.
Okay when i finish the install of the SSD i boot the mac mini up and it should boot to the Regular hard drive and open up SuperDuper and Copy Macintosh HD to SSD drive should be on the list. and then using section i pick backup-all files right? and after i could just use Disk utility to format the old hard drive
Got a lot better with the RAM upgrade. Thanks!
Thanks for the informative DIY vid. Will you provide specifics on the screws you used on the second drive? None of the screws I have from installing PC drives (aka mounting screws) fit.
Thanks!
Great Video…
One question… Can I do exactly the same thing but using the original 500GB HD instead of the new 1TB that you use or is there any “fitting” problem?
thanx for the great video! a couple noob questions, some were kind of asked before, but i’m not really grasping it. i will be using my mac mini for a music server, so i would like a quiet ssd drive – i don’t really need blazing performance. the owc video shows them just replacing the ssd drive and leaving the stock hard drive. why did you choose to replace the stock with the WD? is there any problem with using the stock drive/ssd combo as shown in the owc vid? is it possible to replace BOTH drives with ssd and would their be any advantage to this? and if i go with the ssd and stock drive combo, i take it i would want to set up my mini as having the ssd as the main hard drive? thanx again.
Thanks for this great instructional video! I just completed my install of the Crucial M4 128GB SSD as my system drive and Seagate 500GB 7200rpm drive as second drive, upping the RAM to 8GB, and enabling TRIM support. Couldn’t have done it (or been brave enough to try!) without out your help.
Lion download took a while, but the actual install took only 6 minutes! I’m already loving this SSD business. So cool. Boot time is now 15 seconds from power button push to usable desktop. Shutdown is 4 seconds. All programs load MUCH quicker and overall the system is nice and snappy.
My only regret is not having proper drive mounting screws and rubber grommets for the holes in the drive carrier. I figured out a great workaround by using screws with rounded heads (some HDD mounting screws I had laying around). The rounded heads fit nicely into the holes in the plastic drive carrier in the Mac mini but they are too large to go through the holes. I left them protruding a small amount on the side facing the front of the Mac mini and screwed them in all the way on the back side. After ensuring that the screws facing the front were aligned and resting in the holes in the carrier, I turned my attention to the screws facing the rear of the Mac mini. I lined up the drive so the drive screws were centered on the holes in the carrier. Then, I reached my screwdriver through the hole and LOOSENED the drive mounting screw (to make it stick out further) and it seated nicely in the carrier hole. This worked like a charm and will suffice until I can locate the Grommets and drive mounting studs to do a proper, anti-vibration mounting.
Anyone been able to find the 4 mounting studs/screws and grommets for less than $36? You’d think the were made of 24-carat gold with the prices I’m seeing. If anyone has a cheaper way to do a proper vibration isolation mounting, please post it here!
Bobby –
I bought the a mid-2011 mac mini, with lion pre-installed. I want to buy an SSD drive and use that as my main drive. How did you get lion onto your main SSD?
You mentioned a protective sheet taken from the mini’s stock drive and another one from another laptop. Can these be purchased anywhere?
Thank you.
Can I just add another SATA 500gb hard drive and keep the original one too??? so I can have 1tb or do i have to have one SATA and one SSD???
Rick,
This is an awesome video. I have never done anything on computers but now I’m thinking of trying this when I get my mini, which should be tomorrow. My question is can I just add the OCZ Vertex 3, what will this do? I ordered the 8 GB memory and that should get to me tomorrow also. Once everything is upgraded the way you did it what Mac is this Mini comparable to? Thanks for taking the time to post this video.
Frank R.
@ Rick
I’d like to buy the torx screwdriver on your video. Where can I buy that?
Hi Rick, excellent video, made me want to upgrade my mini as well. However, it is a mid 2010 version with built in superdrive. iFixit has a dual drive solution by using an optical bay HD housing so the extra HD will fit just like the original superdrive does. Am wondering if I can just take out the entire superdrive structure and treat it like an 2011 mini, adding the extra drive as you did in the video? Any problems you can foresee with this workaround? Thanks, much appreciated!
I bought my set at MicroCenter in Fairfax, Virginia.
If you don’t break anything in the process, you can add any combination of one or two drives. I’ve even recently fit a 14mm 1.5 TB hard drive next to an SSD. The 14mm drives don’t really fit great though. We had to remove the outer casing of the SSD. We had to slide out the logic board and we didn’t snap it back in place completely. But it does work if you really really need that extra space from a 1.5TB drive.
Hold down Command-R to boot into Lion Recovery which allows you to format the drives and download Lion over the Internet.
How does the Vertex 3 SSD work in the Mini? I thought the Mac Mini supported SATA 1.5 or 3Gb/s hard drives and ssd’s. The Vertex 3 SSD is SATA III or SATA 6Gb/s. The cabling is different even though the pinout is the same. Thanks for the informative video.
The Vertex 3 works great. Cabling is the same.
Hi ,
I have a problem.
I just installed a ssd.
After installing the fan runs full speed.
I tried to restore the initial configuration but the fan always runs full speed.
I made the apple hardware test and I got the following error:
4M0T/1/40000002:EXHAUST-0
On Istat the temperatures are correct but will appear in fans “RPM EXHAUST-0 ”
Can you help please
Thanks for posting all this stuff. I’m planning to buy an Mac Mini i7 2.7ghz, put in 16 gb of RAM, an OWC 6G SSD, and a 1 TB drive of some sort. OWC gives videos on installing only a new SINGLE HD into a Mac Mini, while people like you an http://www.ifixit.com have showed this type of stuff, and ifixit.com sells a kit. As a long-time OWC customer, I asked them about the DOUBLE drive upgrade, and they said it’s best to be left to professionals like themselves for $99, you or Apple, due to possible thermal issues/overheating (I’m paraphrasing). I don’t question their motives at all, as they offer videos for regular guys like me to do plenty of other upgrades, but is there any precautions you’d suggest in light of this? For example, that ‘other protective sheet from another laptop’ at 6:10 in the video? I don’t have one of those! But maybe I can buy it somewhere if necessary? Thanks again and sorry for the long-winded question!