Simplicity
The paperless office is the holy grail of organizers. It would be great to scan paper and then throw it right away, only to rely on the electronic scans. In my experience, these paperless implementations typically fail because they are too complicated and don’t offer real improvements over paper filing.
For the system to work, the workflow should have 1) very few clicks, and 2) the ability to create files that are fully searchable because they have embedded text created through OCR (Optical Character Recognition). Without this OCR function, you would need to properly name and categorize every document to be able to find it easily. That just takes too long. But with documents created with embedded text, you can use your computer’s search to find the document based on any text it contains.
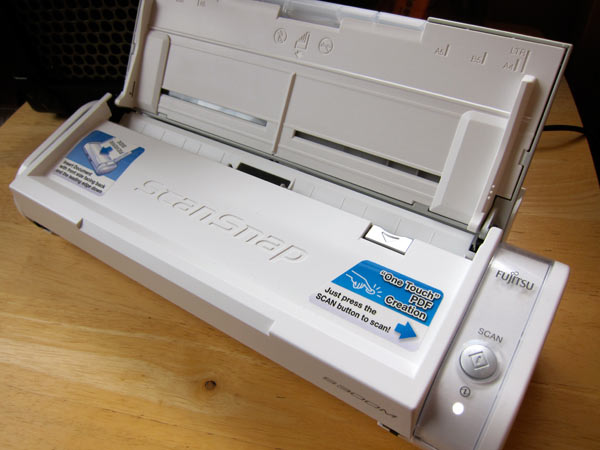
ScanSnap S300M
There are many ways to go about creating such a system. My favorite is to use a Fujitsu ScanSnap S300M paired with a Mac. It is fast, scans in duplex, and can be part of a simple automated system through the use of Apple scripts.
Setup Steps
Below are my steps to setup everything. Thanks to Joe Kissell of MacWorld for this post and the update post which I used heavily.
- Buy a ScanSnap S300M
and Apple computer with Mac OSX Snow Leopard.
- Install ScanScap software (for me v2.2 came with the ScanSnap).
- Download ScanSnap upgrade to make it compatible with Snow Leopard.
- Install Adobe Acrobat
(not included with ScanSnap S300M)
- Open System Preferences. Open Universal Access. Check off Enable access for assistive devices. This is necessary for the script in the next step. (NOTE: SEE UPDATE OF THIS STEP FOR OS X MAVERICKS)

- Download ocr-this-acrobatscpt.zip and extract the Action Script file which I modified from MacWorld. Copy the scpt file into the folder /Library/Scripts/Folder Action Scripts. (NOTE: I modified this file so that it would work on the scan after it was finished. On long scans, the original MacWorld script failed because it tried to open the file while it was still being created. I also have this run only on pdf files and have Acrobat close when the process is finished.)
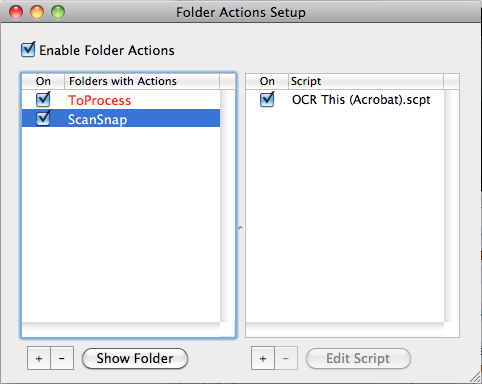
- Right-click (Control-click) on your scans folder (I use Documents/ScanSnap) and click Folder Actions Setup... Select OCR This (Acrobat).scpt, and click on Attach. Click Enable Folder Actions. Close the window.
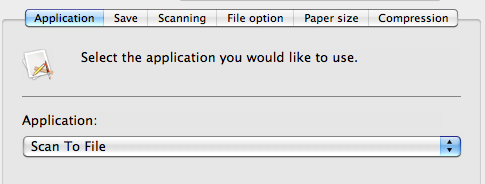
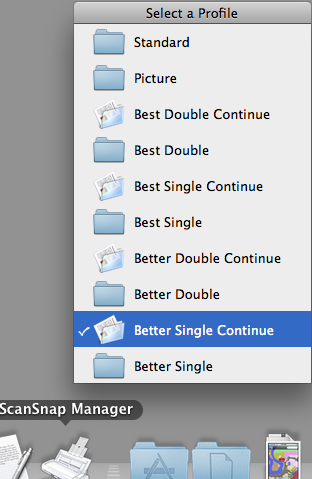
- Open the ScanSnap Manager Settings. Here is where you set up your Profiles to be able to quickly choose scan settings. I create profiles for Single Sided, Double Sided, Continuous (see Step 12), different qualities (Step 10), and Pictures Step 11). See Workflow Step 1 below for all the profiles that I use. Unfortunately the Standard profile can not be deleted or renamed.
- On all the Profiles (except Continuous scanning; see Step 12), in the Applications tab, I select Scan to File. This option does not ask where to save the file and simplifies the workflow. It simply saves the file with the location and name format used in the Save tab. I use the Documents/ScanSnap folder that has the Apple Script enabled.
- On the Scanning tab, note the options for Image quality: Normal (Fastest) (Color: 150dpi, Monochrome: 300dpi); Better (Faster) (Color: 200dpi, Monochrome: 400dpi); Best (Slow) (Color: 300dpi, Monochrome: 600dpi); Excellent (Slower) (Color: 600dpi, Monochrome: 1200dpi). I use Better for most documents and Best for Pictures. This tab is also where you set Single-sided, Double-sided (Duplex), and Continue scanning after current scan is finished for the profiles where you want those options. The continue scanning option lets you scan documents, then add more documents to the feeder, keeping all of them in one file.
- For pictures which don’t need to be OCR’d, I save that to a different file location (I use Documents/ScanSnap Pictures) . Under the Scanning tab chose the Color mode of Color. The File Option tab should have jpg selected for the format. I also compress the file less (making a larger file).
- If you want to use the Scanning tab option Continue scanning after current scan is finished
 .. that profile should have the Application tab select Scan to Folder.
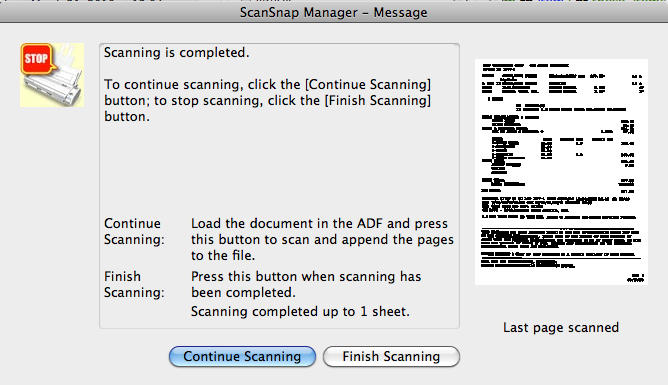
  This is because the pause in scanning could be too long and the script would attempt to OCR the file while still being created. The Scan to Folder option should be used with the Save tab saving the file to a different temporary folder (I use Picturtes/ScanSnap Temp but anywhere works. Nothing is stored here permanently). Then when you scan a document and the scanning is complete, you are asked where to save the file (by default the last location is shown). Then save it to the ScanSnap folder that has the Action Script enabled. Note: the Continue Scanning feature allows you to scan documents, then provides you with the following message in order to continue scanning into the same file until you are complete.
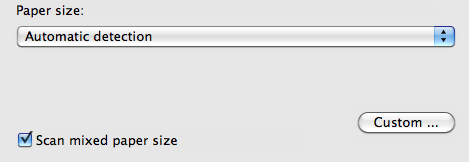
- On the Paper size tab, I leave Automatic detection selected and check off Scan mixed paper size.
Workflow Steps
Now to the workflow for using this.
- Select a Profile if it changed. Before scanning, click the ScanSnap Manager icon in the dock. Choose the appropriate profile. The profile stays the same unless you change it, so if you are scanning the same kind of document that you last scanned, this step is not necessary.
- Scan. Put the document in the ScanSnap scanner. Press the SCAN button on the ScanSnap. That’s it. If everything is set up correctly, the document will be scanned, opened automatically in Acrobat within 7 seconds (I have a delay in the AppleScript to make sure that the scanning is complete), have text recognition performed, and then saved with the date and time of the scan.
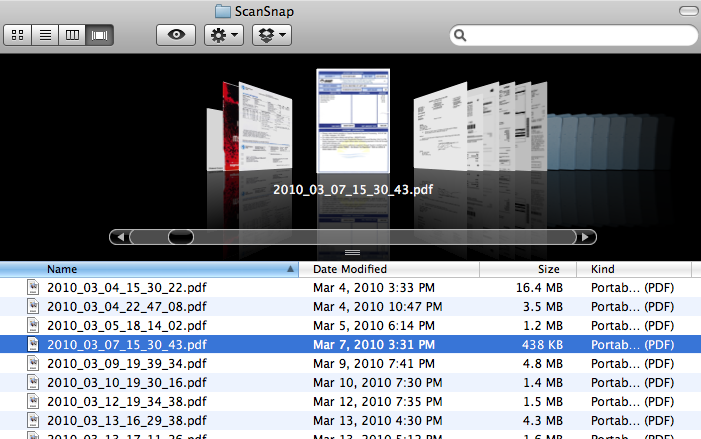
- Move file to a folder. I then take the newly created file and move it to one of 10-20 folders, remembering that file categorization is not critical because any file can be found through a search for the embedded text using Spotlight. I create folders under the scan folder just to keep everything in one spot. (Note: This required me to modify the Apple Script to only look for pdf files. Otherwise, it would attempt to OCR anything, including a new folder.) By using Cover Flow, you can see the files without opening them, making it easier to categorize them into folders.
Done
That’s it. Okay, it’s not quite a snap to set up. But once you have it working, it is a system with very few clicks that should encourage you to get rid of paper.
There are many other approaches to simplify the scanning and OCR process. You can look at the MacWorld article referenced above or this DocumentSnap article on creating a Droplet. Let me know if you have improvements to this process or have other ideas for a simple scan/OCR workflow.

Hi. Interesting post. I was wondering whether you could then go on to name the files automatically using a applescript/automator/hazel workaround. I’m trying to come up with a method whereby after the file has been through the ocr process it is automatically named based on whether certain terms appear in the file itself. For example if a scan of a citibank bank statement contains the words citibank + statement, then the file would be saved into a particular folder as citibank_statement_todays date hence removing a lot lof the tedious manual naming. Sadly my applescripting skills are non existant
I’d appreciate any thoughts you have on the subject.
Thanks
Mark