 What is HD Radio?
Unfortunately, HD Radio has a misleading name. The letters “HD” stand for nothing. They only mean that it is digital instead of to analog. Digital does not mean that it is higher definition or higher quality than analog. It does mean that radio stations can fit more channels on the same spectrum.
What does HD Radio give you?
The Washington D.C. metro area has some great HD Radio stations. HD Radio gives you free extra channels to listen to outside of what is available on a normal AM/FM radio. Every channel listed below with a -2 or -3 is an extra channel that is not offered in analog AM or FM.
Washington D.C. HD Radio Listing
| WAMU-HD |
88.5 FM |
Nws/Tlk/Inf, American University |
| WAMU-HD2 |
88.5-2 FM |
Bluegrass, American University |
| WAMU-HD3 |
88.5-3 FM |
BBC / NPR / WTMD, American University |
| WPFW Soon in HD |
89.3 FM |
Jazz, Pacifica Foundation |
| WCSP-HD |
90.1 FM |
Nws/Tlk/Inf, National Cable Satellite Corporation |
| WCSP-HD2 |
90.1-2 FM |
C-Span, National Cable Satellite Corporation |
| WCSP-HD3 |
90.1-3 FM |
C-Span 2, National Cable Satellite Corporation |
| WETA-HD |
90.9 FM |
Clscl/NPR, Greater Washington Educational Telecomm Association |
| WKYS Soon in HD |
93.9 FM |
Urban AC, Radio One Inc. |
| WTGB-HD |
94.7 FM |
Alternative, CBS Radio |
| WTGB-HD2 |
94.7-2 FM |
Adult Alternative – The Jam, CBS Radio |
| WPGC-HD |
95.5 FM |
CHR/Rhymc, CBS Radio |
| WPGC-HD2 |
95.5-2 FM |
Gospel, CBS Radio |
| WHUR-HD |
96.3 FM |
Urban AC, Howard University |
| WHUR-HD2 |
96.3-2 FM |
WHUR World, Howard University |
| WASH-HD |
97.1 FM |
AC, Clear Channel |
| WASH-HD2 |
97.1-2 FM |
Smooth Jazz, Clear Channel |
| WMZQ-HD |
98.7 FM |
Country, Clear Channel |
| WMZQ-HD2 |
98.7-2 FM |
Classic Country, Clear Channel |
| WLZL Soon in HD |
99.1 FM |
Tropical, CBS Radio |
| WLZL-HD2 Soon in HDon |
99.1-2 FM |
Hispanic AC, CBS Radio |
| WIHT-HD |
99.5 FM |
CHR, Clear Channel |
| WIHT-HD2 |
99.5-2 FM |
New CHR, Clear Channel |
| WBIG-HD |
100.3 FM |
Oldies, Clear Channel |
| WBIG-HD2 |
100.3-2 FM |
Oldies 50’s & 60’s, Clear Channel |
| WWDC-HD |
101.1 FM |
Rock, Clear Channel |
| WWDC-HD2 |
101.1-2 FM |
eRockster, Clear Channel |
| WMMJ Soon in HD |
102.3 FM |
Urban AC, Radio One Inc. |
| WTOP-HD |
103.5 FM |
News, Bonneville International Corp. |
| WTOP-HD2 |
103.5-2 FM |
iChannel -Global Unsigned Bands, Bonneville International Corp. |
| WTOP-HD3 |
103.5-3 FM |
Traffic and Weather, Bonneville International Corp. |
| WPRS-HD |
104.1 FM |
Black Gospl, Radio One Inc. |
| WJZW-HD |
105.9 FM |
Oldies, Citadel |
| WJZW-HD2 |
105.9-2 FM |
Smooth Jazz, Citadel |
| WJFK-HD |
106.7 FM |
Talk/Sprts, CBS Radio |
| WRQX-HD |
107.3 FM |
Hot AC, Citadel |
| WWWT-HD |
107.7 FM |
Talk, Bonneville International Corp. |
| WTNT-HD |
570 AM |
Talk/News, Red Zebra Broadcasting |
| WMAL-HD |
630 AM |
News/Talk, Citadel |
| WXTR Soon in HD |
730 AM |
Sports, Red Zebra Broadcasting |
| WTEM-HD |
980 AM |
Sprts/Talk, Red Zebra Broadcasting |
| WYCB-HD |
1340 AM |
Gospel, Radio One Inc. |
| WOL-HD |
1450 AM |
News/Talk, Radio One Inc. |
| WWWT Soon in HD |
1500 AM |
Talk, Bonneville International Corp. |
How to get HD Radio?
HD Radio’s Wikipedia page lists several HD Radio receivers for your car and home.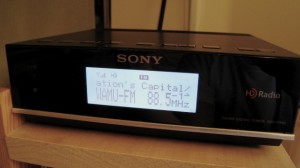
One of my favorites is the Sony XDR-F1HD . This costs about $100 and needs to be connected to an amp/receiver. It can not be connected directly to speakers unless they are powered speakers that can be connected with RCA cables.
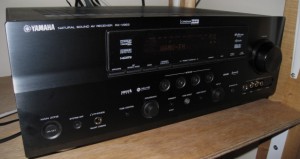 If you need a new amp/receiver, there are some that have HD Radio built-in. My favorite of these is the Yamaha RX-V863, which can be ordered for $619 currently with a little haggling.
Is HD Radio worth it?
HD Radio has been around since 2002 and has been somewhat slow to take off. But if you like the extra stations it gives you, it can be worth the cost of the new equipment. Unlike Sirius and XM, there is no subscription to get HD Radio.
Washington D.C. offers more HD stations than most markets. The extra stations cover many genres and niches such as News, Bluegrass, Alternative, Country, Oldies, Jazz, and Gospel. If any of those stations interest you, give HD Radio a try.
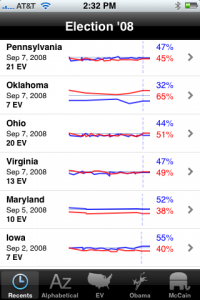 Living in the Washington D.C. area, I meet a lot of political junkies. A great application for them is Election ’08 for iPhone & iPod Touch by Aaron Brethorst. It costs $0.99. While the information it provides is freely available from electoral-vote.com, Election ’08 displays the information well and is easy to browse. It gives you the polls and trends by state, as well as historical data for past elections.
 What is HD Radio?

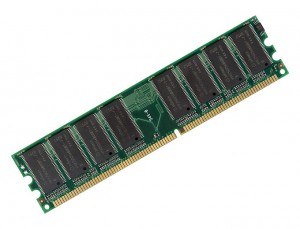 You should test new RAM to make sure that it works. You should also test existing RAM when your computer is acting weird. Computer RAM does go bad. When it does, you can see erratic behaviors such as computer freezes, incorrect screen drawings, and corrupted files. Most people assume that this is due to a virus.