It used to be you needed both a laptop for travel and a desktop for more power. But nowadays laptops are a lot more powerful than they used to be and the cream of the crop are the MacBooks. With an external monitor, keyboard, mouse, and usb hub, you can easily switch from laptop mode to desktop mode with any MacBook by just plugging in 2 cables.
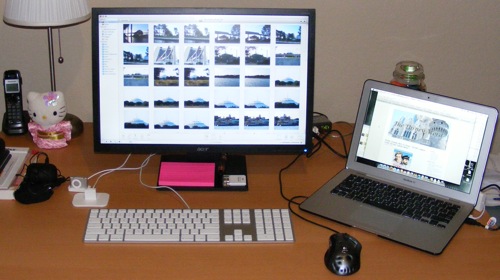
External Monitor
You can get an excellent big screen LCD for a lot cheaper than you used to. You can hook it up to your MacBook , MacBook Pro
 , or MacBook Air
 with a DVI adapter and the exact adapter varies based on your model. The original MacBook Air was nice enough to come with this adapter. The new Airs and MacBooks do not so they’ll cost you an extra $30. One of the best value monitors you can get is the Acer V223-WBD 22″ LCD
 (pictured above with MacBook Air). Macs are smart when it comes to detecting external monitors so you can just plug in and the new monitor should almost immediately become an extended screen once powered on. When you unplug, the Mac is similarly smart and goes back to single screen mode.
Keyboard and Mouse
Since we’re talking about Macs, the best keyboard to go with is the slim Apple Keyboard . Pretty much any usb mouse will do but I highly recommend the Logitech MX518 Mouse
 . It is technically a gaming mouse but I just love it for the precision and extra buttons on the side that can be setup to quickly access expose.
USB Hub
A terrific USB hub is the D-Link 7-port USB hub . 7 ports may sound like a lot but with a keyboard, mouse, ipod/iphone cable, and external hard drive, you’re already mostly full. With the hub, all your USB devices are plugged into this and then you just have to plug in one USB cable to your MacBook.
External Hard Drive
One area where laptops are still greatly lacking is hard drive space. If you don’t have much in iTunes or iPhoto, you might be fine with just a 80-250GB laptop hard drive. If you need more space, you’ll need to get an external drive such as the Western Digital 750GB My Book . To move your iPhoto Library to your external drive, copy the “iPhoto Library” file from your Pictures directory to your external drive. The next time you start iPhoto, hold down the option key and you’ll be given a choice to select where your iPhoto Library is. Once you select the library on the external drive, you won’t have to hold down option again. The only downside is you will need your external drive hooked up to see the library. Similarly, you can copy your Music directory to the external drive and then open iTunes preferences and go to the Advanced tab. There you can change the iTunes Music folder location to point to your external drive Music directory. You should only do these things if you need to. Often you might just have to move just iPhoto or just iTunes based on your usage.
Time Machine
If you plan to use Time Machine, which we recommend, you should consider partitioning your external drive into 2 partitions using Disk Utility which can be found in the Utilities directory under Applications. Select your drive on the left of Disk Utility and then select the Partition tab. You can slide the separator up and down to adjust the partition sizes. We recommend giving yourself room to grow for your data such as iPhoto and iTunes and then leave whatever else for Time Machine to utilize. When you are happy with your settings, click Apply. You can then setup Time Machine to use 1 partition and put your iPhoto and iTunes data on the other. The reason you need to setup 2 partitions is because Time Machine will continue to grow until it’s partition is full so you need to ensure your data has a separate area to grow.
Summary
With a little planning, you can have all the benefits of a laptop and a desktop with just one laptop. Just plug in a USB cable to activate all your USB devices. Plug in your external monitor to use your desktop sized LCD. These principles can also be applied to a Linux or Windows laptop although not with such ease. The performance of the MacBook line is what makes them ideal candidates for desktop-power uses such as photo editing. If you have a MacBook, you likely don’t need a desktop and just buying an external LCD is a very cheap desktop solution.

 4. Download the free EASEUS Disk Copy. This will provide you with a .iso file that you can burn to CD as a disk image.
