Spirit – New Jailbreak for iPhone, iPod Touch, and iPad

The new Spirit jailbreak is out. Wow, this takes about 20 seconds to do. It’s far easier than earlier jailbreaks and now it works on iPads, both WiFi and 3G.

What is jailbreaking and why should you do it, you ask? Then you probably shouldn’t. It can easily destroy everything. But one thing that it offers is background apps, a feature that will arrive in a few months in iPhone OS 4.

Note to iPad users: many apps do NOT work and will make your iPad’s desktop look like a giant iPhone. Backgrounder seems to work. Kirikae does not. See this spreadsheet of working/non-working jailbroken apps for the iPad.

Print File List on a Mac

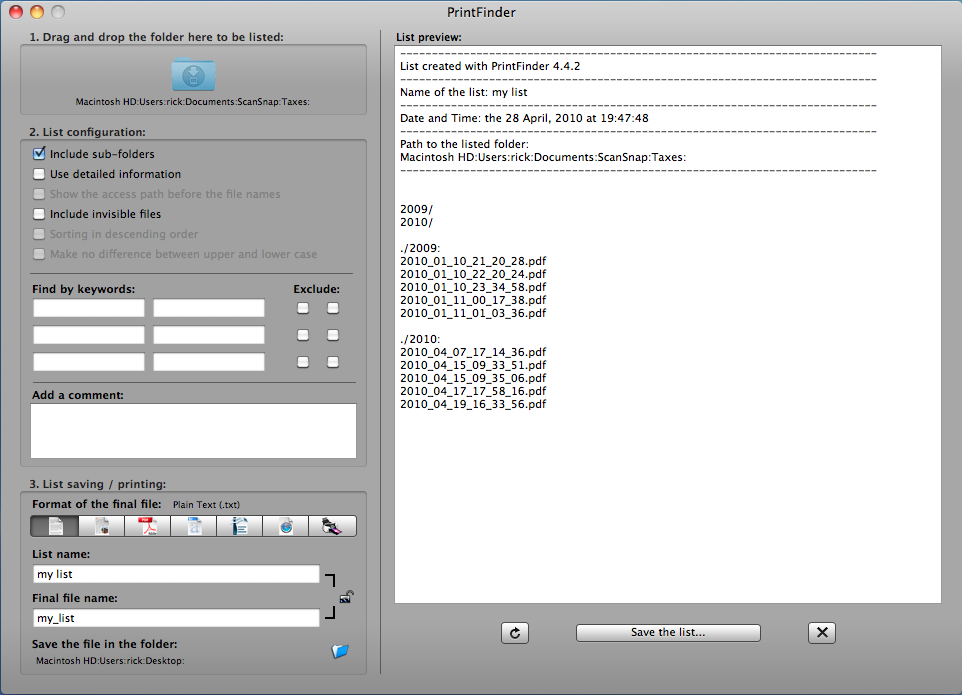
A recent Mac customer needed to send someone a list of files in one of their folders. We used this free PrintFinder program. You simply drag the folder you are interested in onto the folder icon at the top left of the application. PrintFinder has loads of configuration options for what to include. You can then copy the text from the preview area to the right or save it as one of many file types (pdf, word, etc).

There are other ways to save file lists using terminal commands, but I prefer PrintFinder for all its options.

VNC Port Forwarding for FiOS

Because setting up VNC with a router is tricky, I thought it would be helpful if I wrote up how to do it with the popular FiOS Actiontec router based on my recent VNC set up for a small business in Arlington, Virginia.

FiOS

FiOS is a high speed fiber internet service offered by Verizon and popular in northern Virginia. In November 2005, Verizon chose Herdon, Virginia as the second city to get FiOS after Keller, Texas. While Verizon is now stopping its expansion of FiOS into new cities, they just launched FiOS in Washington D.C..

VNC

VNC is an open source free system for remotely sharing desktops, great for remote tech support or just working on your office computer when you’re somewhere else.  See my old post on the benefits of VNC.

While there are many other services for remote computer administration that are simpler to set up and punch through a router automatically, I prefer VNC because it’s free and works great once it’s configured. Also, since VNC is a popular protocol, there are clients and servers for every computer, including PC, Mac, Linux, iPhone (a VNC server is available for jailbroken iPhones and VNC clients are available from the App Store), Andriod, and more.

Setting up VNC with a FiOS Router

This is the standard FiOS router by Actiontec.
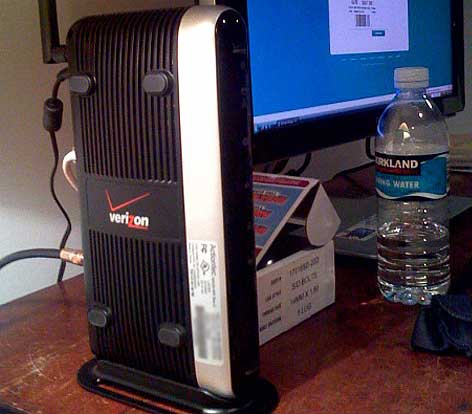
Here are the steps to set up Port Forwarding for VNC on the Actiontec router:

  1. Log into the router by typing 192.168.1.1 into a web browser. The default login is admin and password1.
  2. Once logged in, click on Firewall Settings at the top and click Yes to proceed.
  3. Click on Port Forwarding in the left Menu.
  4. Create a rule by clicking Add. Below is what a created rule looks like. You need to add a protocol and add a port for that protocol. The default VNC connection uses port 5900 and the TCP protocol.
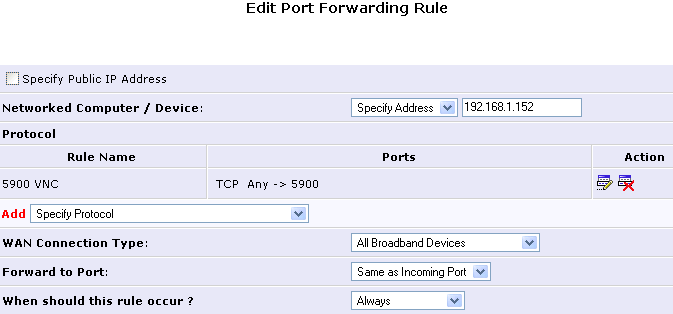
  5. Click Apply. In this example, the rule will then forward everything for port 5900 to the computer at address 192.168.1.152. For simplicity, I have the office computers all using static local IP addresses.

Multiple VNC Computers and Rules

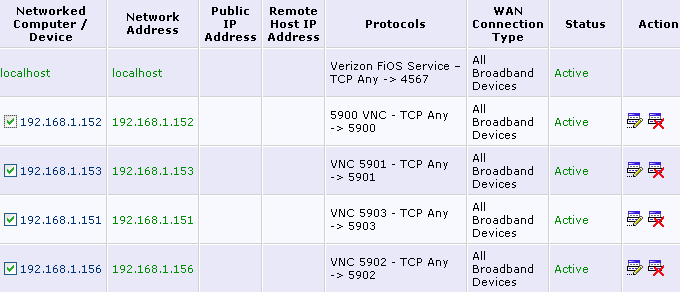
In the case of this office, I set up multiple computers with VNC. For each one, I used a different VNC display number (configured in the computer’s VNC server software). The default display is 0, which corresponds with using port 5900. For the next computer, I set up VNC to use display 1 which corresponds with port 5901. Similarly, the other computers use display 2 with port 5902 and display 3 with port 5903. I then set up a forwarding rule as above for each computer. The port forwarding list then looks like this:
Dynamic DNS

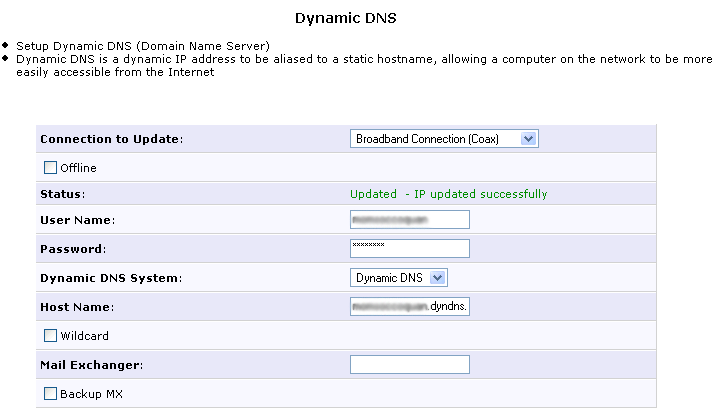
In order to access the computers remotely, you should have a free account with Dnydns.org or another Dynamic DNS service. This allows you to use yourcompanyname.dyndns.org to connect to your computer instead of having to know the IP address of your router which is changing regularly. It gives you all the benefits of a static IP address without the cost. The Dynamic DNS service can be updated automatically with your current IP address from the FiOS Actiontec router.

Click on Advanced at the top, then Dynamic DNS on the left menu to set this up as shown here:
Paperless Office in a Snap

Simplicity

The paperless office is the holy grail of organizers. It would be great to scan paper and then throw it right away, only to rely on the electronic scans.  In my experience, these paperless implementations typically fail because they are too complicated and don’t offer real improvements over paper filing.

For the system to work, the workflow should have 1) very few clicks, and 2) the ability to create files that are fully searchable because they have embedded text created through OCR (Optical Character Recognition). Without this OCR function, you would need to properly name and categorize every document to be able to find it easily. That just takes too long. But with documents created with embedded text, you can use your computer’s search to find the document based on any text it contains.

ScanSnap S300M

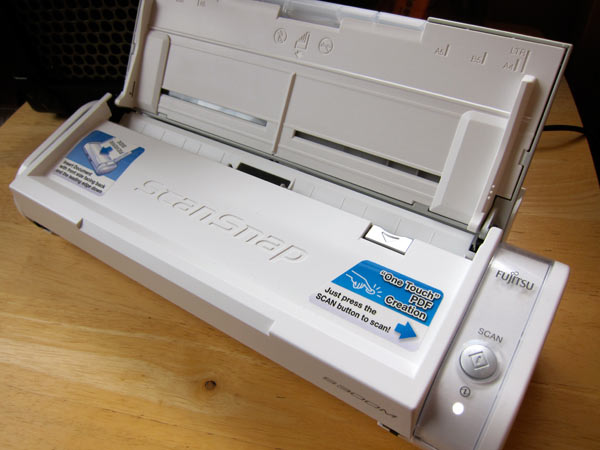
There are many ways to go about creating such a system.  My favorite is to use a Fujitsu ScanSnap S300M paired with a Mac. It is fast, scans in duplex, and can be part of a simple automated system through the use of Apple scripts.ScanSnap S300M

Setup Steps

Below are my steps to setup everything. Thanks to Joe Kissell of MacWorld for this post and the update post which I used heavily.

  1. Buy a ScanSnap S300M and Apple computer with Mac OSX Snow Leopard.
  2. Install ScanScap software (for me v2.2 came with the ScanSnap).
  3. Download ScanSnap upgrade to make it compatible with Snow Leopard.
  4. Install Adobe Acrobat (not included with ScanSnap S300M)
  5. Open System Preferences. Open Universal Access. Check off Enable access for assistive devices. This is necessary for the script in the next step. (NOTE: SEE UPDATE OF THIS STEP FOR OS X MAVERICKS)Enable Assistive Devices
  6. Download ocr-this-acrobatscpt.zip and extract the Action Script file which I modified from MacWorld. Copy the scpt file into the folder /Library/Scripts/Folder Action Scripts. (NOTE: I modified this file so that it would work on the scan after it was finished. On long scans, the original MacWorld script failed because it tried to open the file while it was still being created. I also have this run only on pdf files and have Acrobat close when the process is finished.)
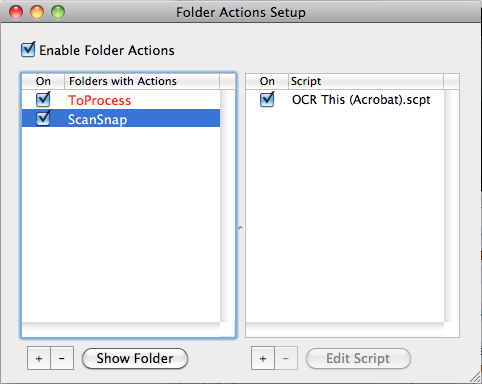
  7. Right-click (Control-click) on your scans folder (I use Documents/ScanSnap) and click Folder Actions Setup... Select OCR This (Acrobat).scpt, and click on Attach. Click Enable Folder Actions. Close the window. Folder Actions Setup
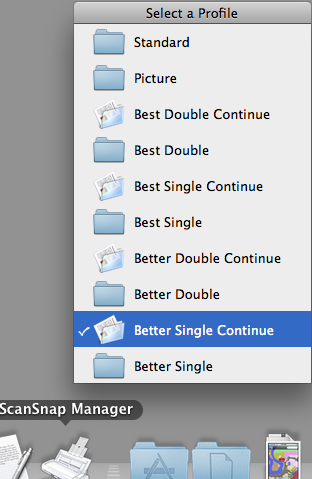
  8. Open the ScanSnap Manager Settings. Here is where you set up your Profiles to be able to quickly choose scan settings. I create profiles for Single Sided, Double Sided, Continuous (see Step 12), different qualities (Step 10), and Pictures Step 11). See Workflow Step 1 below for all the profiles that I use. Unfortunately the Standard profile can not be deleted or renamed.
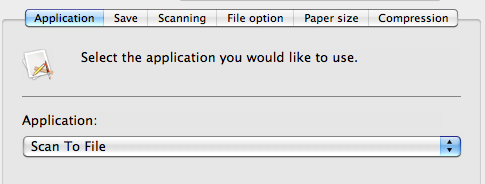
  9. On all the Profiles (except Continuous scanning; see Step 12), in the Applications tab, I select Scan to File. This option does not ask where to save the file and simplifies the workflow. It simply saves the file with the location and name format used in the Save tab. I use the Documents/ScanSnap folder that has the Apple Script enabled.ScanSnap Application Tab
  10. On the Scanning tab, note the options for Image quality: Normal (Fastest) (Color: 150dpi, Monochrome: 300dpi); Better (Faster) (Color: 200dpi, Monochrome: 400dpi); Best (Slow) (Color: 300dpi, Monochrome: 600dpi); Excellent (Slower) (Color: 600dpi, Monochrome: 1200dpi). I use Better for most documents and Best for Pictures. This tab is also where you set Single-sided, Double-sided (Duplex), and Continue scanning after current scan is finished for the profiles where you want those options. The continue scanning option lets you scan documents, then add more documents to the feeder, keeping all of them in one file.
  11. For pictures which don’t need to be OCR’d, I save that to a different file location (I use Documents/ScanSnap Pictures) . Under the Scanning tab chose the Color mode of Color. The File Option tab should have jpg selected for the format. I also compress the file less (making a larger file).
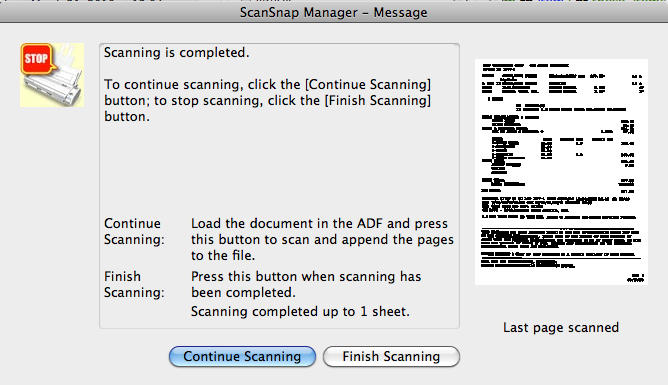
  12. If you want to use the Scanning tab option Continue scanning after current scan is finishedContinue Scanning.. that profile should have the Application tab select Scan to FolderScan to folderThis is because the pause in scanning could be too long and the script would attempt to OCR the file while still being created. The Scan to Folder option should be used with the Save tab saving the file to a different temporary folder (I use Picturtes/ScanSnap Temp but anywhere works. Nothing is stored here permanently). Then when you scan a document and the scanning is complete, you are asked where to save the file (by default the last location is shown). Then save it to the ScanSnap folder that has the Action Script enabled. Note: the Continue Scanning feature allows you to scan documents, then provides you with the following message in order to continue scanning into the same file until you are complete. Continue Scanning Message
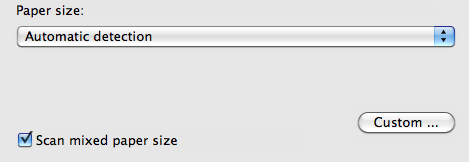
  13. On the Paper size tab, I leave Automatic detection selected and check off Scan mixed paper size.Paper size

Workflow Steps

Now to the workflow for using this.

  1. Select a Profile if it changed. Before scanning, click the ScanSnap Manager icon in the dock. Choose the appropriate profile. The profile stays the same unless you change it, so if you are scanning the same kind of document that you last scanned, this step is not necessary.Select a Profile
  2. Scan. Put the document in the ScanSnap scanner. Press the SCAN button on the ScanSnap. That’s it. If everything is set up correctly, the document will be scanned, opened automatically in Acrobat within 7 seconds (I have a delay in the AppleScript to make sure that the scanning is complete), have text recognition performed, and then saved with the date and time of the scan.
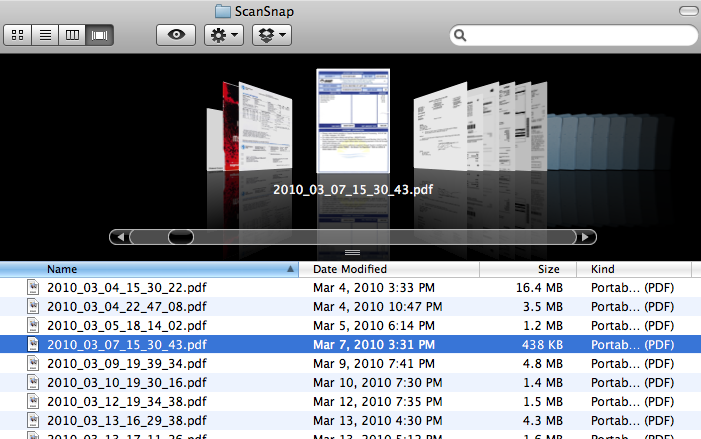
  3. Move file to a folder. I then take the newly created file and move it to one of 10-20 folders, remembering that file categorization is not critical because any file can be found through a search for the embedded text using Spotlight. I create folders under the scan folder just to keep everything in one spot. (Note: This required me to modify the Apple Script to only look for pdf files. Otherwise, it would attempt to OCR anything, including a new folder.) By using Cover Flow, you can see the files without opening them, making it easier to categorize them into folders.ScanSnap files in Cover Flow

Done

That’s it. Okay, it’s not quite a snap to set up. But once you have it working, it is a system with very few clicks that should encourage you to get rid of paper.

There are many other approaches to simplify the scanning and OCR process. You can look at the MacWorld article referenced above or this DocumentSnap article on creating a Droplet. Let me know if you have improvements to this process or have other ideas for a simple scan/OCR workflow.

Organize Your Mac Desktop

A couple of Mac desktop defaults that I like have changed with OSX Snow Leopard. The icons no longer default to a grid and the Hard Drive icon is gone. Here’s how to change it back.

Putting back the Hard Drive:

  1. In the Finder, choose Finder -> Preferences.
  2. Click the General icon on the toolbar.
  3. Select Hard disks in the Show these items on the desktop section.
  4. Close the Finder Preferences window.Show Hard Drive on Desktop

Making your icons align to a grid:

  1. In the Finder, choose View -> Show View Options
  2. Choose Snap to Grid from the Arrange by drop list.Finder View OptionsNotice that this is also where you can change the icon size, grid spacing, and text size.