Thunderbird Add-ons

ThunderbirdYou might have heard about add-ons for the popular web browser Firefox that give it more capabilities. Well, the folks at Mozilla also make a great email client called Thunderbird (PC, Mac, Linux) that has add-ons too.

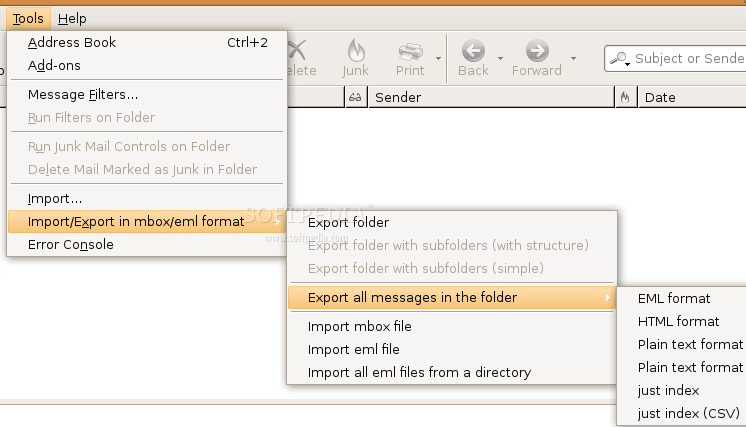
I found this out when I needed to send someone hundreds of emails. The Add-on ImportExportTools (which oddly is not part of Thurderbird’s list of Add-ons) was able to take all the emails I wanted and move them into an HTML indexed folder for easy browsing. This powerful add-on also helps in a myriad of cases when migrating or merging email archives, and it performs some import/export feats that are impossible with other email clients such as Outlook and Mac Mail.

ImportExportTools Thunderbird Add-on

Manage Your Podcasts in iTunes

If you use iTunes and need more control of your podcasts, click on the Settings… tab at the bottom of the iTunes Podcasts page. This gives you the ability to choose download and retention settings. You can set a default and per-podcast setting.

Set a default podcast setting that applies to most of your podcasts, by first choosing:

Podcast Defaults

The individual control of podcasts was added a year ago in iTunes 8 but most people didn’t notice the addition. Now you can, for example, automatically keep only the latest of your news programs while keeping all of your story podcasts.

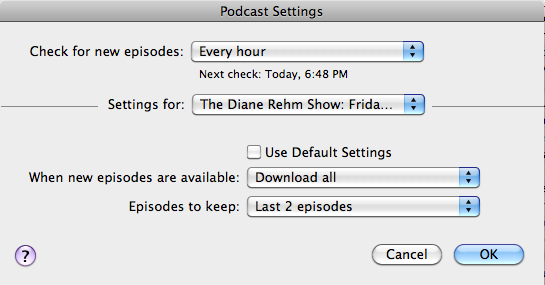
Some podcasts are released in batches. For example, NPR’s Dianne Rehm’s Friday News Roundup podcasts are released two at a time on Friday.  Therefore I set it to Download all instead of the most recent one. If I only downloaded the most recent, I would miss one of the shows.

Podcast Settings

You might also want to Download all if you only sync occasionally and want the most recent files, instead of the most recent podcast and an older podcast from when you last synced.

I find that if you change a podcast to keep only the Last X number of episodes, this does not go into effect immediately, but it eventually goes into effect after a podcast is refreshed.

Test LCD Monitor For Dead Pixels

Software to help find dead pixels

When you get a new monitor or laptop, it is good to see if there are any stuck or dead pixels. The easiest way to find problem pixels is to display solid colors and look over the screen. You have to look at it yourself since the software can’t actually detect if there is a hardware problem with the monitor.

This free software displays solid colors for you to find dead pixels.

For WindowsDead Pixel Tester

For MacPiXel Check

PiXel Check

What if you have dead pixels?

Dead pixels can sometimes be fixed by gently massaging them in a circular motion. In my experience, this works about 20% of the time. Most manufacturers will accept returns if you have a certain number of dead pixels.

Windows 7 Fresh Install from Upgrade Disk

Upgrade Conundrum

Microsoft offers Full and Upgrade versions for each of its Windows 7 versions: Home Premium, Professional, and Ultimate. To qualify for an upgrade, you need to have a copy of Windows 2000, XP, or Vista. Unfortunately, anyone running Windows XP or 2000 can not do an in-place upgrade to 64-bit Windows 7. A migration to Windows 7 is needed. This can be done with an upgrade disk, which moves all your existing files to a windows.old directory. See the this Upgrade/Migration Table to see what is possible for your scenario.

Upgrade from 32-bit Windows XP of Vista to 64-bit Windows 7

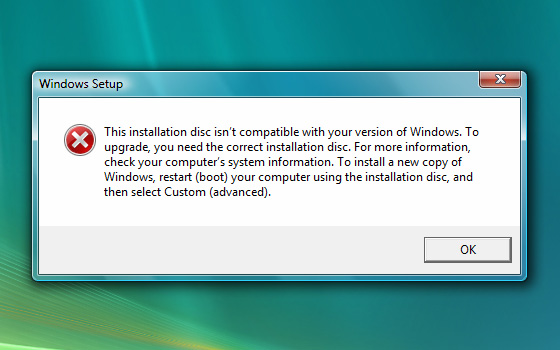
If you back up your files yourself, wipe your hard drive completely, then try to install using the Upgrade disk, it doesn’t work because the Upgrade disk doesn’t see the qualifying product that you are upgrading from.

There are many other reasons to want to do a clean install. It is smart to do a clean install on such a major upgrade. Many people used the beta of Windows 7 after wiping their legal copy of Windows. Those people need a clean install but are legally entitled to use the Upgrade Disk.

Hack Time

Thankfully Paul Thurrott’s Supersite for Windows explains how to get around this technical problem that Microsoft created. Method 1 is to just try the Upgrade activation key to see if it works. If that does not work, Method 2 explains the “hack”:

  1. Install Windows 7 Upgrade DVD and do no put in your upgrade key. Just leave the key blank and do not activate yet.
  2. Open RegEdit by going to the Start Menu search and typing regedit.exe and hit enter.
  3. Navigate on the left menu to: HKEY_LOCAL_MACHINE/Software/Microsoft/Windows/CurrentVersion/Setup/OOBE/
  4. Double-click on MediaBootInstall and change it from “1” to “0”. Close RegEdit.
  5. Type cmd in Start Menu search to display a shortcut to the Command Line utility. Right-click this shortcut and choose “Run as administrator.” Accept the UAC prompt.
  6. Type in the command line: slmgr /rearm
  7. Hit enter and wait for the completion notice.
  8. Reboot.
  9. Activate Windows with your Upgrade Key

Microsoft Upset

Microsoft is upset that this “hack” could be used to illegally install the Upgrade on computers that do not qualify for it. See Paul Thurrott’s response to this: Enough, Microsoft. No One Is Endorsing Piracy. Obviously.

Also consider that Microsoft doesn’t have to act this way. Apple realizes that activation keys do more to frustrate legitimate users than to thwart thieves. That’s one of the reasons that Apple’s operating systems have never had an activation system. Upgrades and full installs just work. Apple trusts that most of its users will do the right thing.

Windows 7 OEM Version

For technically savvy users looking for a better deal on Windows 7, this isn’t even needed. One can purchase a cheaper OEM version of Windows 7 from Newegg for building a new computer. This comes without support from Microsoft, but is a great deal for people who do not rely on Microsoft support.

Adding Music to iTunes from a USB drive

If you copy music into your iTunes library, there is a setting in iTunes that will make it easier to deal with your library.

Consolidate Library

Let’s take an example. By default, when you take MP3s on a USB drive and drag them into iTunes, the music will show up in iTunes. However, iTunes is still using the files that are located on your USB drive.  As soon as you remove the USB drive, those songs in the iTunes library will have an exclamation point next to them and not be playable.

The problem has to due with the “Consolidate Library” feature. Consolidating the library moves all your music that is in the iTunes library to the iTunes folder. This keeps everything together. Oddly, this feature is not on by default.

Solution

If you want to avoid this problem and keep iTunes organized automatically, go to:

For iTunes Windows: iTunes > Edit > Preferences > Advanced tab
For iTunes Mac: iTunes > Preferences > Advanced tab

Make sure “Keep iTunes Music folder organized” is checked
Make sure “Copy files to iTunes Music folder when adding to library” is checked

iTunes Consolidate Library