What you need
1. T6 and T8 torx screwdrivers
2. Phillips Head screwdriver
3. Microfiber cleaning cloth
4. Suction cups
5. External USB or firewire backup hard drive
6. New SATA hard drive. We recommend the 1.5TB Western Digital Green Drive
| Step 1 – Backup via Time Machine
Before you start, you have to first make sure you have a recent time machine backup. After installing the new drive, we will restore from this backup. |
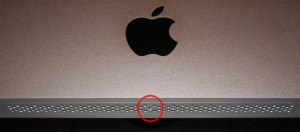
Step 2 – Remove RAM slot
The RAM slot is held on with just 1 screw. Unscrew it and pop off the panel. The screw does not fall out but remains in the panel itself. If you are upgrading RAM, this all all you need to do.
|
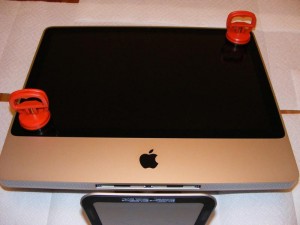
Step 3 – Remove the glass screen
This may seem like a scary step but it is extremely easy. Firmly attach suction cups at opposite corners. Then gently lift up. The glass is held on with magnets and comes off with very little effort. I recommend laying out a towel or paper towels to lay the glass on. Be careful not to scratch the glass or screen beneath it. If at all possible, try to do this work in a non dusty area because we will later need to clean off the dust between the glass and LCD screen. |
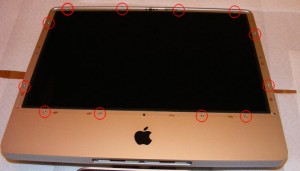 Step 4 – Remove front aluminum casing Step 4 – Remove front aluminum casing
There are 12 screws around the edges holding on the front aluminum casing. Unscrew them all keeping track of which ones go where since they are varying lengths. You can then lift upwards around the edges to take off the front casing. Flip it towards the top of the imac and lay it on the table above it so that you do not have to unhook the camera. |
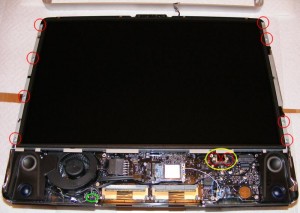 Step 5 – Remove LCD panel Step 5 – Remove LCD panel
The LCD is held down with 8 screws on the sides which need to be removed. There is a cable marked in green toward the bottom which needs to be unhooked. There is also a connector to the right marked in yellow that is held down with 2 screws. Remove the screws and pull the connector upwards to unhook it. You should then lift up the LCD gently where you will see 2 power connectors toward the upper right that need unplugging. The LCD should then be free to place elsewhere. The hard drive will now be visible. |
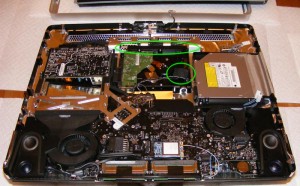 Step 6 – Remove the old hard drive Step 6 – Remove the old hard drive
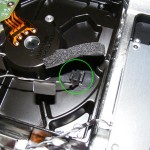
There is a cushion glued on top of the heat sensor cable. Gently pull up this cushion keeping it in one piece and try to maintain its stickiness for later. The heat sensor is held in place in a plastic notch and can slide out of it.
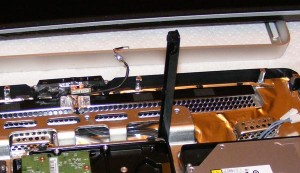 There is a black plastic bar holding the hard drive in place. Lift it up from left to right to unlock it. This can be very challenging since it is tight. The drive can then slide up and out and you can unhook the power and SATA cables. There is a black plastic bar holding the hard drive in place. Lift it up from left to right to unlock it. This can be very challenging since it is tight. The drive can then slide up and out and you can unhook the power and SATA cables.
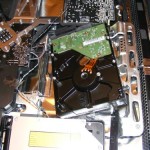
|
| Step 7 – Add the new hard drive
There are 4 screws on the old hard drive which need to be removed and added to the new hard drive so that it can slide into the holders on the iMac. Once the power and SATA cables are plugged back in, you can slide it back in and lower the black plastic bar to lock it in place. Place the heat sensor on the drive in about the same area where it was and use the sticky cushion to hold it in place. If it doesn’t seem sticky enough to hold, you can get some rubber cement from your local home depot and add just a bit to hold it in place. |
| Step 8 – Put the system back together
Rebuilding the system is mostly straightforward. It can be handy to have an extra pair of hands to hold the LCD as you reconnect the power cables. We recommend you lay out the screws in an orderly manner so that you know exactly which one goes where as you rebuild.
Once the system is rebuilt except for the glass, you want to use the microfiber cloth to remove any dust or debris on the front of the LCD screen and back of the glass. You will also need to use the microfiber cloth to clean the front of the glass once you remove the suction cups. |
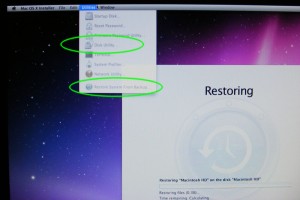 Step 9 – Restore from Time Machine backup Step 9 – Restore from Time Machine backup
When you first boot up, insert the Mac OS X install disc and hold down the option key while booting so you can select the disc to boot from.
Step through the install until the Utilities menu appears at the top of the screen. First use Disk Utility to erase the disk and create a volume. Then choose to restore from backup from the same menu and choose your external time machine backup. Your system will then be just as it was except with a new hard drive. |
