I recently had to diagnose poor ethernet speeds in a home in Arlington, VA. A person was getting 60 Mbps/sec, certainly not bad, but far less than the paid for 100 Mbps/sec. The problem was first diagnosed by going to speed test websites:
https://www.speakeasy.net/speedtest/
This computer had FIOS, so I plugged a testing computer I had directly into the ONT (optical network terminal, where the fiber enters the house). From there I did get 100 Mbps/sec, so I knew the culprit was within the home network. I next tested the speeds from the home router. Those speeds, over both wifi and ethernet showed the slow speeds. So the main culprit appeared to be the cable connecting the ONT to the router.
To test the cable, I used iPerf, one of my favorite speed test tools. To buy a dedicated device that tests speeds can cost in the thousands of dollars from a company like Fluke. This is because you’re essentially buying a computer to do the tests. iPerf is a free tool that just uses your computers for the testing. You need to install iPerf on two computers and run one in client and one in server mode.
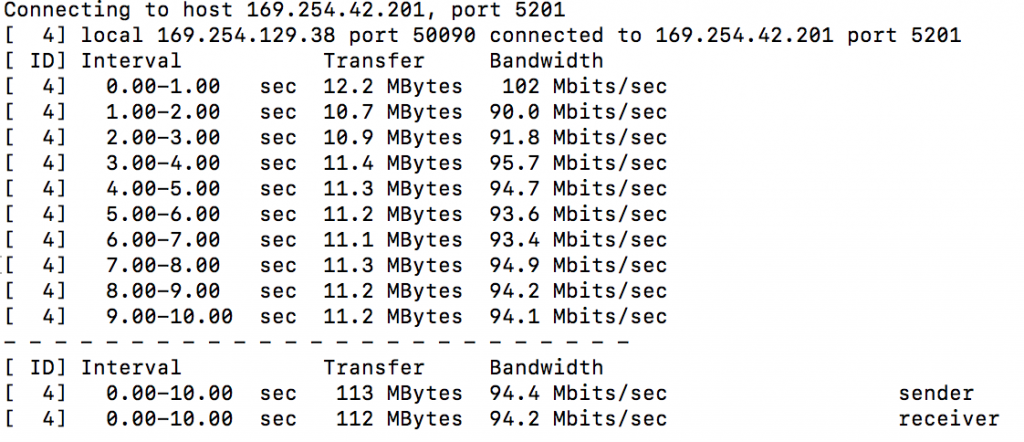
I used iPerf to test that suspect cable and got the following results:
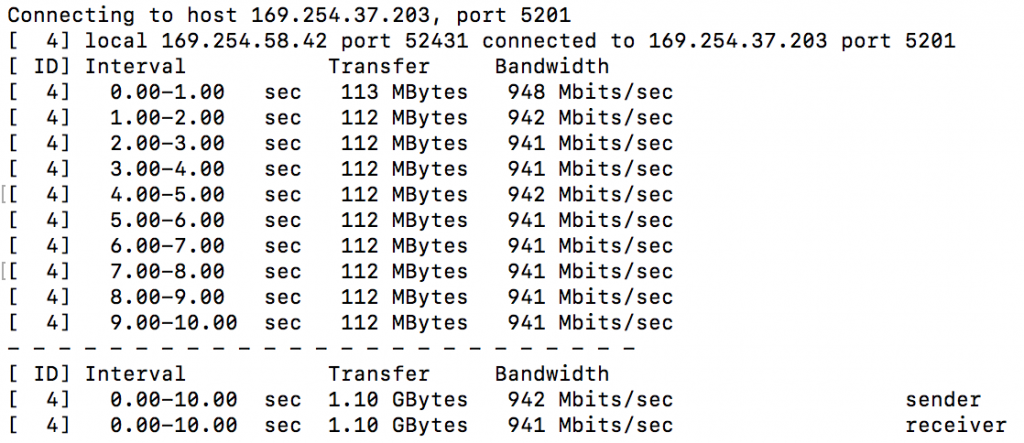
 A good cable should get 10x this speed. So I re-terminated one of the cable ends to see if that would fix the cable. I couldn’t easily replace the cable since it took a difficult path through a wall. Happily fixing one end of the cable gave me the following iPerf results:
This is what an operational cable’s results look like, showing gigabit speeds.
I next tested other ethernet jacks and the WiFi using iPerf and everything else checked out.
Unfortunately, this kind of testing isn’t widely performed. Most people don’t noticed degraded speeds in the first place. And if they do notice, they don’t know where to start to figure out the problem. Comcast and Verizon don’t normally perform this level of testing in my experience. Once the internet providers see good speeds getting to the house, they let the users deal with local network issues.


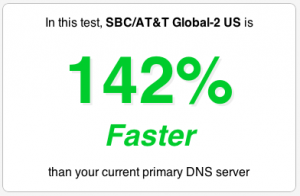
 When you go to any website, the browser first has to lookup where that site is located. This is done by connecting to a domain name server (DNS). There are many DNS options, not just the default of the ISP. Often other options are much faster. Most websites actually load content from various domains at once so each DNS request adds up in how fast your internet experience feels.