Ransomware

We’ve seen a recent rise in “ransomware” that infects and encrypts computers, then demands money for you to get your data back.

I reported back in March 2011 having seen ransomware demanding $200. Today, it is asking for $300 within 10 hours.

The name of the virus is CryptoLocker. The US Computer Emergency Readiness Team has a good write up on CryptoLocker.

To avoid this ransomware, we recommend using a Mac which can not be infected. Or just keep your PC antivirus up to date and avoid clicking on links on email or websites that you are unsure about.

Fax a PDF from a Mac

Faxing seems to be an ancient technology that just won’t die.  It is still embraced, often even preferred or required, by many businesses.  Most people don’t want to have to own a fax machine any more but do have to fax from time to time.  There is a modern day solution.  You can easily fax any PDF from a Mac.  And since you can convert anything in a browser to a PDF easily on a Mac, it allows you to fax almost anything you could print out.

Apple makes a USB fax modem but sadly, they’ve not maintained it so it doesn’t work on the latest Macs any more.  Fortunately, US Robotics makes a great US Robotics USB Fax Modem that is compatible with a Mac.

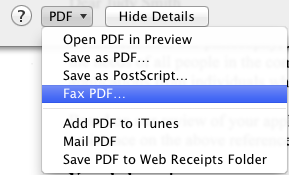
Once plugged into a Mac, you’ll notice you have gained a new option via the Print PDF menu.

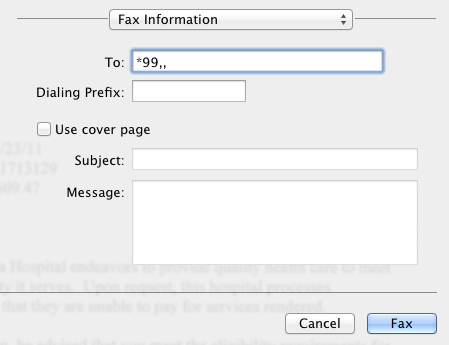
If you’re like me and have dropped your expensive home phone service for a cheaper Voice over IP phone line, then you may have a little more work to do to actually get a fax to go through.  In the case of the popular Ooma Telo Free Home Phone Service, you have to tell the line that you are about to fax so it can optimize the connection.  This is done by prepending a *99,, to the phone number you are faxing to.

2011 Mac Mini Hard Drive Upgrade Video

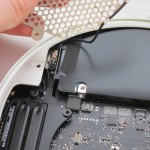
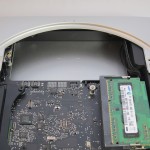
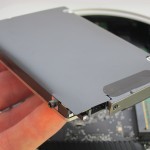
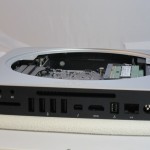
We just upgraded a 2011 Apple Mac Mini to have an SSD, a second hard drive, and new RAM.

Video


Also available on YouTube in High Definition or Standard Definition.

Parts List

  • OCZ 120 GB Vertex 3 SATA III 6.0 Gb-s 2.5-Inch Solid State Drive VTX3-25SAT3-120G
  • Western Digital 1TB Blue WD10JPVT 5400RPM, 8 MB cache, 2.5 inch, 9.5MM height hard drive
  • Corsair 8 GB DDR3 Laptop Memory Kit CMSO8GX3M2A1333C9
  • Apple Mac Mini Model MC816LL/A 2.5 GHz Intel Core i5 dual-core processor, AMD Radeon HD 6630M graphics, 4GB RAM, 500GB hard drive
  • Cable: Apple Part 922-9560, also called “Apple Mac Mini Server (Mid 2010) Bottom Hard Drive Server Flex Cable” or “Hard Drive Flex Cable Bottom”. We used part number 1009005 at welovemacs.com. This is sold as a kit from ifixit.com.

Alternate Parts List

The OCZ Vertex 3 is the fastest consumer SSD at the moment. Other SSD’s that you might consider include:

The Western Digital Blue drive mentioned above is high capacity and quiet. For a faster spinning hard drive consider:

The dedicated graphics in the mid-tier Mac Mini make it worth it for me. But for the cheapest Mini, consider:

  • Apple Mac Mini MC815LL/A 2.3 GHz Intel Core i5 dual-core processor, integrated Intel HD Graphics 3000, 2GB RAM, 500GB hard drive

UPDATE: My video shows adding two 9.5MM height drives. I just upgraded another Mac Mini with a 9.5MM SSD and a 12.5MM standard hard drive. As with my first upgrade, the hard drive goes in the bottom slot (the side closest to the top of the case when upright). This does fit. But first you need to slide the logic board out slightly. Be sure to remove the IR port adapter before sliding out the logic board. The OWC video shows how to do this. I used a cut up coat hanger to insert into the logic board holes and slide it out.

First Boot

Starting with a blank hard drive is easy on the 2011 Mac Mini. Hold down Command-R to boot into Lion Recovery which allows you to format the drives and download Lion over the Internet.

TRIM Support in Lion

For optimal SSD performance, enable TRIM support within OS X Lion. Grant Pannell describes the terminal commands to enable TRIM.

Photos of Upgrade

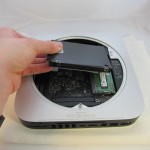
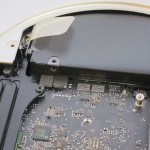
Opened
Opened
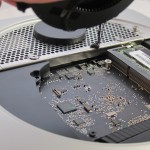
Fan Removal
Fan Removal
WiFi Connection
WiFi Connection
Empty Hard Drive Bay
Empty Drive Bay
Original Hard Drive
Original Hard Drive
Drive Bay Side View 1
Drive Bay Side View 2
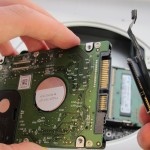
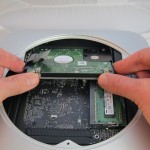
New Hard Drive & Cable
New Hard Drive Insertion
New SSD
New SSD
New SSD & Drive Cables Attached
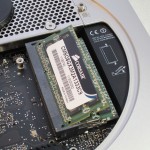
New RAM
New RAM
Attach Fan
Attach Fan

Mac Software Striping RAID Performance

The Mac OS includes software RAID options.  Using the striping option, you can double your storage and greatly improve your read/write performance.  But what is the true performance gain and is it worth doing?
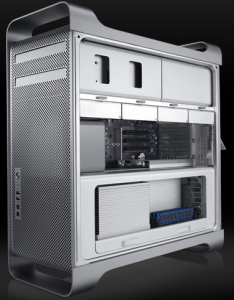
Mac Pro

What you need

First, you need a Mac capable of holding at least 2 drives.  This is actually a problem for most Macs.  Only the Mac Pro is capable of that off the shelf.  The Mac Mini can be hacked to do so but it involves removing the DVD drive and soldering in a 2nd hard drive.  The system I used in this test is the latest entry-level Mac Pro from early 2009.

Second, you need another hard drive.  The Mac Pro can actually hold 4 but for the purposes of this test, I’m only adding 1. This Mac Pro comes with a 640GB Western Digital Caviar Blue so I purchased another identical to that.  It is best to have 2 identical drives when doing striping so that both drives can be fully used.  If you’re looking for Mac Mini drives, we recommend the 500GB Western Digital Scorpio Blue.

Backup original drive

In order to add the 2nd drive, you’ll need to fully backup your first drive so that you can restore it later.  When creating a RAID setup, the drives will be wiped clean.  If you already have a time machine backup, you can do a restore from that but I prefer using Disk Utility to do a backup and restore because it can create a fully bootable 100% identical backup that you can then restore from Disk Utility off of a Leopard boot disc.  Disk Utility doesn’t word things very well.  Both a backup and a restore are both under the Restore tab.  When you backup, you just do a restore from your Macintosh HD to your external backup drive.  If you want the backup to be bootable, be sure it is partitioned with a GUID Partition Table scheme under Options.

Add the drive

Now that your data is backed up, you can add your new drive.  In the Mac Pro, this is the quickest and easiest hard drive addition ever.  Simply unlatch the drive holders and slide one out.  There are 4 screws already in there waiting to go into the new drive.  Then you just slide in the new drive and that’s it.  If you’re using a Mac Mini, you’ll need to follow this Mac Mini upgrade guide.
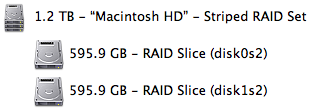
Mac RAID

Create the RAID
Boot up the mac off of a Leopard disc by holding down C.  Choose your language and then you’ll be able to launch Disk Utility from the top menu.  Select one of the drives and go to the RAID tab.  Enter the RAID Set Name to be the standard drive name Macintosh HD.  Then drag both of your drives to the RAID set window.  Both will show up and show the combined storage based on your RAID type.  Mirroring is for a duplicate backup.  Striping is for performance and extra storage.  You can select Create to create the software RAID and it shouldn’t take more than a few minutes.

Restore

If you did a time machine backup, you can go through the standard Leopard install and choose restore from time machine.  If you did a disk utility backup, select your new Macintosh HD volume and go to the Restore tab.  Choose your external backup drive as your source and the Macintosh HD as the destination.  If you have a lot of data, this can take several hours.  If all went well, your system should now be able to boot off your new striping RAID Macintosh HD volume.

Performance

Now that we’ve got our striping RAID, how does it perform?  Using the Xbench disk test, the drive performance has gone from a score of 73 to 112.  That’s about a 53% improvement overall.  The test uses a variety of disk usage and this striping will perform differently based on exactly how the data is being used.  The biggest benefit will be for large files.  For example, if you use a virtual machine like VMware Fusion, the virtual RAM is written and read to the hard drive when you do a suspend or resume of the OS.  The result is that with a striping RAID volume, this feels about twice as fast. Striping also combines the drives so you double the capacity.

The down side

The biggest negative is that with 2 drives required to be working, we’ve doubled the likelihood of the Macintosh HD volume failing.  If just 1 drive breaks, the whole volume is lost.  Fortunately, Apple provides time machine which gives us a reliable and effortless backup.  If you do lose a drive, you’ll need to replace the bad drive and restart the RAID set from scratch and restore.  Another downside is that because this is a software RAID, it does use a little CPU which hardware RAID would not.  But a Mac Pro hardware RAID card will set you back $700 and the CPU usage is so small, I can’t even notice it when looking at Activity Monitor.

Conclusion

If you want to massively improve your disk performance, adding a second drive and creating a striping RAID set is a great choice.  This is easy in a Mac Pro but can be done on a Mac Mini with some work.  Just be sure you always have a time machine backup running in case your RAID fails.
2009 Mac Desktop Benchmarks

The latest versions of the Mac Mini, iMac, and Mac Pro all show improvements over previous versions.  Besides a few changes in connections, physically they are relatively unchanged.  The main improvement is in performance.

With the upcoming release of the next Mac operating system, Snow Leopard, the threading performance of your Mac hardware is now more important than ever.  Snow Leopard will be more optimized for multi-threading than any of its predecessors.  The latest Mac desktops will benefit more than previous models since they outperform significantly on thread benchmarks.

The following benchmark scores were collected by the popular Xbench Mac benchmarking software.  The new desktops are all of the entry level models. For all tests, a higher score is better.

Model Thread Test UI Test Memory Test
2006 iMac Core 2 Duo 2GHz 171 257 133
2009 Mac Mini Core 2 Duo 2GHz 231 258 162
2009 iMac Core 2 Duo 2.66GHz 360 379 177
2009 Mac Pro Xeon 3500 2.66GHz 543 409 374

It should be no surprise that the Mac Pro performs the best.  The Mac Mini has always been underpowered but at least it still outperforms some previous iMac models with similar CPU.  The entry-level iMac for $1,199 posts extremely impressive results.  For half the price of a Mac Pro, the thread performance was still great.  However, the Mac Pro truly dominates in the memory test.  The newer nehalem architecture uses tri-channel RAM which is significantly faster.  Any memory intensive applications will see a big improvement on a Mac Pro.  The iMac and Mac Mini won’t use nehalem until the end of 2009 at the earliest.

It is hard to highly recommend the Mac Mini just because it feels like it should come with a faster than 2GHz processor.  For the first time though, you can hook up 2 monitors to the Mac Mini.  The iMac offers the best value by far.  It performs great and isn’t overly expensive.  If you want the best performance and money is no object, the Mac Pro is for you.  Once Snow Leopard comes out, the performance of these new Macs should increase significantly.